<?xml version="1.0" encoding="utf-8"?><feed xmlns="http://www.w3.org/2005/Atom" ><generator uri="https://jekyllrb.com/" version="3.10.0">Jekyll</generator><link href="https://cyberjunky.nl/feed.xml" rel="self" type="application/atom+xml" /><link href="https://cyberjunky.nl/" rel="alternate" type="text/html" /><updated>2026-06-11T10:15:14+00:00</updated><id>https://cyberjunky.nl/feed.xml</id><title type="html">CyberJunky’s Blog</title><subtitle>Thing I have written down</subtitle><author><name>Ron</name></author><entry><title type="html">Linux Disk Cleanup: Quick Commands to Free Up Space</title><link href="https://cyberjunky.nl/linux-disk-cleanup-quick-commands-to-free-up-space/" rel="alternate" type="text/html" title="Linux Disk Cleanup: Quick Commands to Free Up Space" /><published>2026-01-24T20:39:08+00:00</published><updated>2026-01-24T20:39:08+00:00</updated><id>https://cyberjunky.nl/linux-disk-cleanup-quick-commands-to-free-up-space</id><content type="html" xml:base="https://cyberjunky.nl/linux-disk-cleanup-quick-commands-to-free-up-space/"><![CDATA[<p>Running low on disk space? It happens to the best of us. Whether it’s accumulated cache files, forgotten Docker images, or orphaned Python virtual environments, disk space has a way of disappearing. This quick reference guide covers the most effective commands to reclaim your precious storage.</p>

<h2 id="overview">Overview</h2>

<p>This guide covers:</p>

<ul>
  <li>Checking disk usage and finding space hogs</li>
  <li>Cleaning cache and log files</li>
  <li>Pruning Docker resources</li>
  <li>Removing Python virtual environments</li>
  <li>Package manager cache cleanup</li>
  <li>Finding and managing large files</li>
</ul>

<h2 id="check-disk-usage-first">Check Disk Usage First</h2>

<p>Before cleaning, let’s see where your space went.</p>

<h3 id="overall-disk-usage">Overall Disk Usage</h3>

<div class="language-plaintext highlighter-rouge"><div class="highlight"><pre class="highlight"><code>df -h
</code></pre></div></div>

<p>This shows all mounted filesystems and their usage. Look for partitions at 90%+ capacity.</p>

<h3 id="find-largest-directories">Find Largest Directories</h3>

<div class="language-plaintext highlighter-rouge"><div class="highlight"><pre class="highlight"><code>du -h --max-depth=2 /home/$USER 2&gt;/dev/null | sort -rh | head -30
</code></pre></div></div>

<p>This reveals the top 30 space consumers in your home directory.</p>

<h3 id="find-python-virtual-environments">Find Python Virtual Environments</h3>

<div class="language-plaintext highlighter-rouge"><div class="highlight"><pre class="highlight"><code>find /home/ron -maxdepth 3 -type d -name ".venv" -exec du -sh {} \; 2&gt;/dev/null | sort -rh
</code></pre></div></div>

<p>Virtual environments can easily consume 500MB+ each!</p>

<h2 id="quick-cleanup-commands">Quick Cleanup Commands</h2>

<h3 id="1-clear-user-cache-2-3gb-typical-savings">1. Clear User Cache (~2-3GB typical savings)</h3>

<p>The <code class="language-plaintext highlighter-rouge">~/.cache</code> directory accumulates data from browsers, package managers, and applications. It’s safe to clear:</p>

<div class="language-plaintext highlighter-rouge"><div class="highlight"><pre class="highlight"><code>rm -rf ~/.cache/*
</code></pre></div></div>

<p>Don’t worry—applications will rebuild their caches as needed.</p>

<h3 id="2-clean-journal-logs">2. Clean Journal Logs</h3>

<p>Systemd journal logs can grow surprisingly large over time:</p>

<div class="language-plaintext highlighter-rouge"><div class="highlight"><pre class="highlight"><code>sudo journalctl --vacuum-size=100M
</code></pre></div></div>

<p>This keeps only the most recent 100MB of logs.</p>

<h3 id="3-clean-docker-can-free-10gb">3. Clean Docker (can free 10GB+)</h3>

<p>Docker is notorious for consuming space with unused images, containers, and volumes:</p>

<div class="language-plaintext highlighter-rouge"><div class="highlight"><pre class="highlight"><code>docker system prune -a
</code></pre></div></div>

<p>⚠️ <strong>Warning</strong>: This removes all unused images, not just dangling ones. Make sure you don’t need to quickly restore any containers.</p>

<h3 id="4-remove-python-virtual-environments">4. Remove Python Virtual Environments</h3>

<p>Virtual environments are easy to recreate, so they’re safe to delete:</p>

<div class="language-plaintext highlighter-rouge"><div class="highlight"><pre class="highlight"><code># Remove all venvs in home subdirectories
rm -rf ~/*/.venv

# Or remove a specific one
rm -rf ~/path/to/project/.venv
</code></pre></div></div>

<p>To recreate a venv later:</p>

<div class="language-plaintext highlighter-rouge"><div class="highlight"><pre class="highlight"><code>uv sync
# or
pip install -r requirements.txt
</code></pre></div></div>

<h3 id="5-clean-package-manager-caches">5. Clean Package Manager Caches</h3>

<h4 id="apt-debianubuntu">APT (Debian/Ubuntu)</h4>

<div class="language-plaintext highlighter-rouge"><div class="highlight"><pre class="highlight"><code>sudo apt-get clean
sudo apt-get autoremove
</code></pre></div></div>

<h4 id="python-pip">Python pip</h4>

<div class="language-plaintext highlighter-rouge"><div class="highlight"><pre class="highlight"><code>pip cache purge
</code></pre></div></div>

<h4 id="uv-fast-python-package-manager">UV (fast Python package manager)</h4>

<div class="language-plaintext highlighter-rouge"><div class="highlight"><pre class="highlight"><code>uv cache clean
</code></pre></div></div>

<h3 id="6-find-large-files">6. Find Large Files</h3>

<p>Hunt down those forgotten ISO files and log dumps:</p>

<div class="language-plaintext highlighter-rouge"><div class="highlight"><pre class="highlight"><code>find /home/ron -type f -size +100M -exec ls -lh {} \; 2&gt;/dev/null | sort -k5 -rh
</code></pre></div></div>

<p>This finds all files larger than 100MB, sorted by size.</p>

<h2 id="pro-tips">Pro Tips</h2>

<ul>
  <li><strong>Always check before deleting</strong>: Use <code class="language-plaintext highlighter-rouge">du</code> and <code class="language-plaintext highlighter-rouge">find</code> to verify what you’re about to remove</li>
  <li><strong>Virtual environments are disposable</strong>: They can always be recreated from <code class="language-plaintext highlighter-rouge">requirements.txt</code> or <code class="language-plaintext highlighter-rouge">pyproject.toml</code></li>
  <li><strong>Archive old projects</strong>: Move unused projects to external storage rather than deleting</li>
  <li>
    <p><strong>Set up log rotation</strong>: Configure systemd journal to limit log size automatically:</p>

    <div class="language-plaintext highlighter-rouge"><div class="highlight"><pre class="highlight"><code>sudo journalctl --vacuum-time=7d
</code></pre></div>    </div>
  </li>
  <li><strong>Monitor regularly</strong>: Add <code class="language-plaintext highlighter-rouge">df -h</code> to your routine to catch issues early</li>
</ul>

<h2 id="conclusion">Conclusion</h2>

<p>With these commands in your toolkit, you can quickly reclaim gigabytes of disk space. The biggest wins usually come from Docker cleanup, cache clearing, and removing unused virtual environments. Make it a habit to run these cleanups monthly, and you’ll never be caught off guard by a full disk again.</p>

<hr />

<p><em>Written for CyberJunky’s Blog</em></p>]]></content><author><name>Ron</name></author><category term="linux" /><category term="linux" /><category term="fixes" /><category term="docker" /><summary type="html"><![CDATA[Running low on disk space? It happens to the best of us. Whether it's accumulated cache files, forgotten Docker images, or orphaned Python virtual environments, disk space has a way of disappearing. This quick reference guide covers the most effective commands to reclaim your precious storage. Overview This guide covers: * Checking disk usage and finding space hogs * Cleaning cache and log files * Pruning Docker resources * Removing Python virtual environments * Package manager cache]]></summary></entry><entry><title type="html">My 15-Day KNX Home Automation Journey</title><link href="https://cyberjunky.nl/my-15-day-knx-home-automation-journey/" rel="alternate" type="text/html" title="My 15-Day KNX Home Automation Journey" /><published>2025-03-08T14:07:47+00:00</published><updated>2025-03-08T14:07:47+00:00</updated><id>https://cyberjunky.nl/my-15-day-knx-home-automation-journey</id><content type="html" xml:base="https://cyberjunky.nl/my-15-day-knx-home-automation-journey/"><![CDATA[<h3 id="welcome-to-my-15-day-knx-home-automation-journey-with-home-assistant">Welcome to My 15-Day KNX Home Automation Journey with Home Assistant!</h3>

<p>Hello, home automation enthusiasts! I’m thrilled to announce that I’m embarking on an exciting 30-day journey to set up a comprehensive KNX-based home automation system using Home Assistant. Over the next month, I’ll be diving deep into the world of KNX devices, exploring their capabilities, and integrating them seamlessly into my smart home setup.</p>

<p>Each day, I’ll be sharing my experiences, tips, and insights as I configure and optimize my KNX devices. Whether you’re a seasoned home automation pro or just getting started, I invite you to join me on this adventure. Together, we’ll discover the power and flexibility of KNX technology and how it can transform your home into a truly intelligent living space.</p>

<p>Stay tuned for daily updates, tutorials, and reviews as I navigate the ins and outs of KNX and Home Assistant. Let’s make our homes smarter, one (or two) device(s) at a time!</p>

<p>Happy automating!</p>

<p>Ron</p>]]></content><author><name>Ron</name></author><category term="knx" /><category term="knx" /><category term="home-assistant" /><category term="tiny home" /><summary type="html"><![CDATA[Welcome to My 15-Day KNX Home Automation Journey with Home Assistant! Hello, home automation enthusiasts! I'm thrilled to announce that I'm embarking on an exciting 30-day journey to set up a comprehensive KNX-based home automation system using Home Assistant. Over the next month, I'll be diving deep into the world of KNX devices, exploring their capabilities, and integrating them seamlessly into my smart home setup. Each day, I'll be sharing my experiences, tips, and insights as I configure a]]></summary></entry><entry><title type="html">Crypto trading with freqtrade</title><link href="https://cyberjunky.nl/crypto-trading-with-freqtrade/" rel="alternate" type="text/html" title="Crypto trading with freqtrade" /><published>2024-02-14T09:15:48+00:00</published><updated>2024-02-14T09:15:48+00:00</updated><id>https://cyberjunky.nl/crypto-trading-with-freqtrade</id><content type="html" xml:base="https://cyberjunky.nl/crypto-trading-with-freqtrade/"><![CDATA[<p>Some snippets/notes on how to use <em>freqtrade</em>.</p>

<p><a href="https://www.freqtrade.io/en/latest/">https://www.freqtrade.io/en/latest/</a><br />
<a href="https://github.com/freqtrade/freqtrade">https://github.com/freqtrade/freqtrade</a></p>

<div class="language-plaintext highlighter-rouge"><div class="highlight"><pre class="highlight"><code>$ sudo apt install -y python3-pip python3-venv python3-pandas python3-pip git

$ git clone https://github.com/freqtrade/freqtrade.git

$ cd freqtrade
$ git checkout stable

$ ./setup.sh -i
ubuntu-pc:~/freqtrade$ ./setup.sh -i

/usr/bin/python3.8
using Python 3.8
-------------------------
Installing mandatory dependencies
-------------------------
Debian/Ubuntu detected. Setup for this system in-progress
[sudo] password for ron: 
...
----------------------------
Reseting branch and virtual env
----------------------------
Reset git branch? (This will remove all changes you made!) [y/N]? 
...
EAD is now at 38b96f07 Merge pull request #4434 from freqtrade/new_release
- Deleting your previous virtual env
...
-------------------------
Updating your virtual env
-------------------------
pip install in-progress. Please wait...
Collecting pip
  Using cached pip-21.0.1-py3-none-any.whl (1.5 MB)
Installing collected packages: pip
  Attempting uninstall: pip
    Found existing installation: pip 20.0.2
    Uninstalling pip-20.0.2:
      Successfully uninstalled pip-20.0.2
Successfully installed pip-21.0.1
Do you want to install dependencies for dev [y/N]? y
Do you want to install plotting dependencies (plotly) [y/N]? y
Do you want to install hyperopt dependencies [y/N]? y
...
-------------------------
Please use 'freqtrade new-config -c config.json' to generate a new configuration file.
-------------------------
-------------------------
Run the bot !
-------------------------
You can now use the bot by executing 'source .env/bin/activate; freqtrade &lt;subcommand&gt;'.
You can see the list of available bot sub-commands by executing 'source .env/bin/activate; freqtrade --help'.
You verify that freqtrade is installed successfully by running 'source .env/bin/activate; freqtrade --version'.

$ source .env/bin/activate
$ freqtrade new-config -c config.json

(.env) ubuntu-pc:~/freqtrade$ freqtrade new-config -c config.json
? Do you want to enable Dry-run (simulated trades)? Yes
? Please insert your stake currency: EUR
? Please insert your stake amount: 33
? Please insert max_open_trades (Integer or 'unlimited'): 3
? Please insert your desired timeframe (e.g. 5m): 5m
? Please insert your display Currency (for reporting): EUR
? Select exchange other
? Type your exchange name (Must be supported by ccxt) xxxxxxxx
? Do you want to enable Telegram? Yes
? Insert Telegram token *********************************************
? Insert Telegram chat id xxxxxxxxx
2021-03-19 14:52:58,091 - freqtrade.commands.build_config_commands - INFO - Writing config to `config.json`.

Edit config.json and add API key and secret.

Get available trading pairs from your exchange

$ freqtrade list-pairs -1

Add them to config.json pairlist

Get data

$ freqtrade  download-data -c config.json --timerange 20200101- -t 1h

$ freqtrade backtesting --ticker-interval 1h -s BbandRsi -c config.json b --export trades --export-filename user_data/backtest_results/backtest-result.json


Plot Graphs
$ python3 ./scripts/plot_dataframe.py -s BbandRsi  -p ZEC/BTC --indicators1 bb_lowerband,bb_middleband,bb_upperband --indicators2 rsi
</code></pre></div></div>]]></content><author><name>Ron</name></author><summary type="html"><![CDATA[Some snippets/notes on how to use freqtrade. https://www.freqtrade.io/en/latest/ https://github.com/freqtrade/freqtrade $ sudo apt install -y python3-pip python3-venv python3-pandas python3-pip git $ git clone https://github.com/freqtrade/freqtrade.git $ cd freqtrade $ git checkout stable $ ./setup.sh -i ubuntu-pc:~/freqtrade$ ./setup.sh -i /usr/bin/python3.8 using Python 3.8 ------------------------- Installing mandatory dependencies ------------------------- Debian/Ubuntu detected. Setup]]></summary></entry><entry><title type="html">My Home Assistant Setup - Part 1</title><link href="https://cyberjunky.nl/my-home-assistant-setup/" rel="alternate" type="text/html" title="My Home Assistant Setup - Part 1" /><published>2024-02-14T09:11:56+00:00</published><updated>2024-02-14T09:11:56+00:00</updated><id>https://cyberjunky.nl/my-home-assistant-setup</id><content type="html" xml:base="https://cyberjunky.nl/my-home-assistant-setup/"><![CDATA[<p>I use Home Assistant for quite some years now, started to run it on a Raspberry Pi, a NUC, later went for Home Assistant Blue, and recently bought a Home Assistant Yellow, specially for the built-in radio’s and faster Raspberry CM4 module. <a href="https://www.raspberrypi.com/documentation/computers/compute-module.html">https://www.raspberrypi.com/documentation/computers/compute-module.html</a></p>

<p>I could move over my installation vie the backup-restore method, but I want to document things, clean up unused code, and maybe improve older integrations. (by adding unique id’s, Config Flows etc)</p>

<p>So here a list in no order with all my notes, code snippets and instructions.</p>

<h3 id="the-home-assistant-yellow">
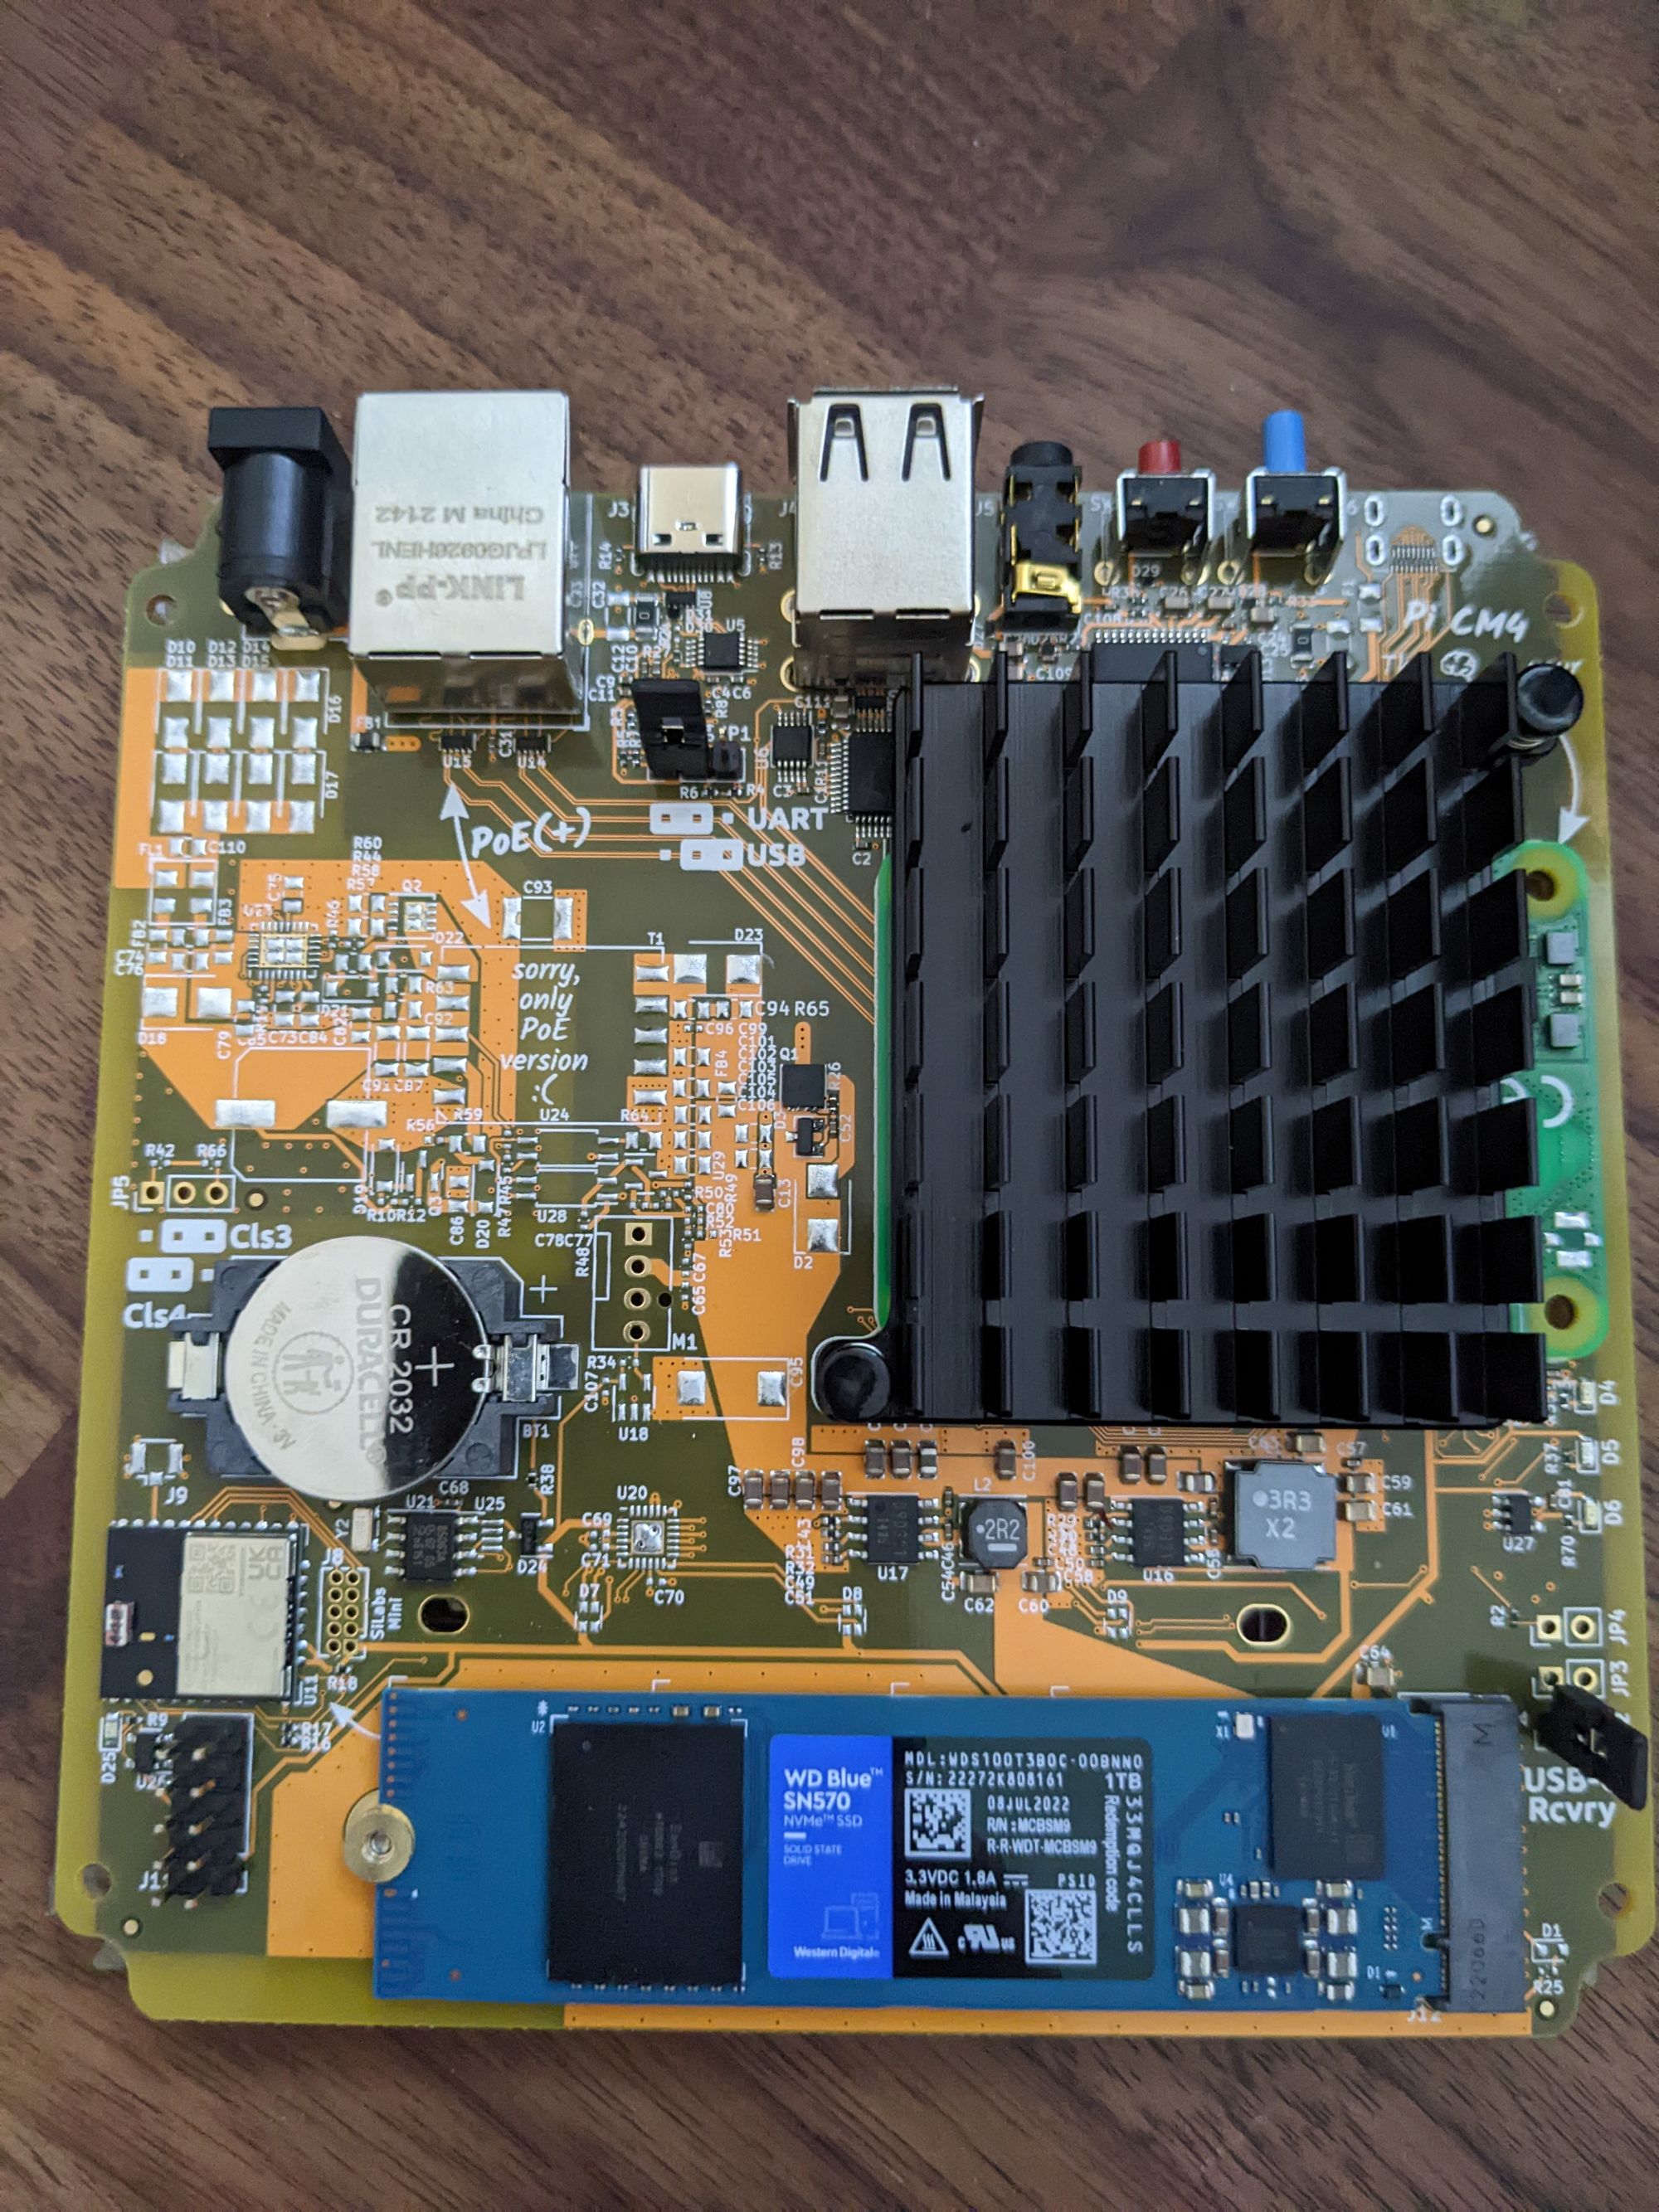
The Home Assistant Yellow</h3>

<p>Get yours here… <a href="https://www.home-assistant.io/blog/2021/09/13/home-assistant-yellow/">https://www.home-assistant.io/blog/2021/09/13/home-assistant-yellow/</a></p>

<p>
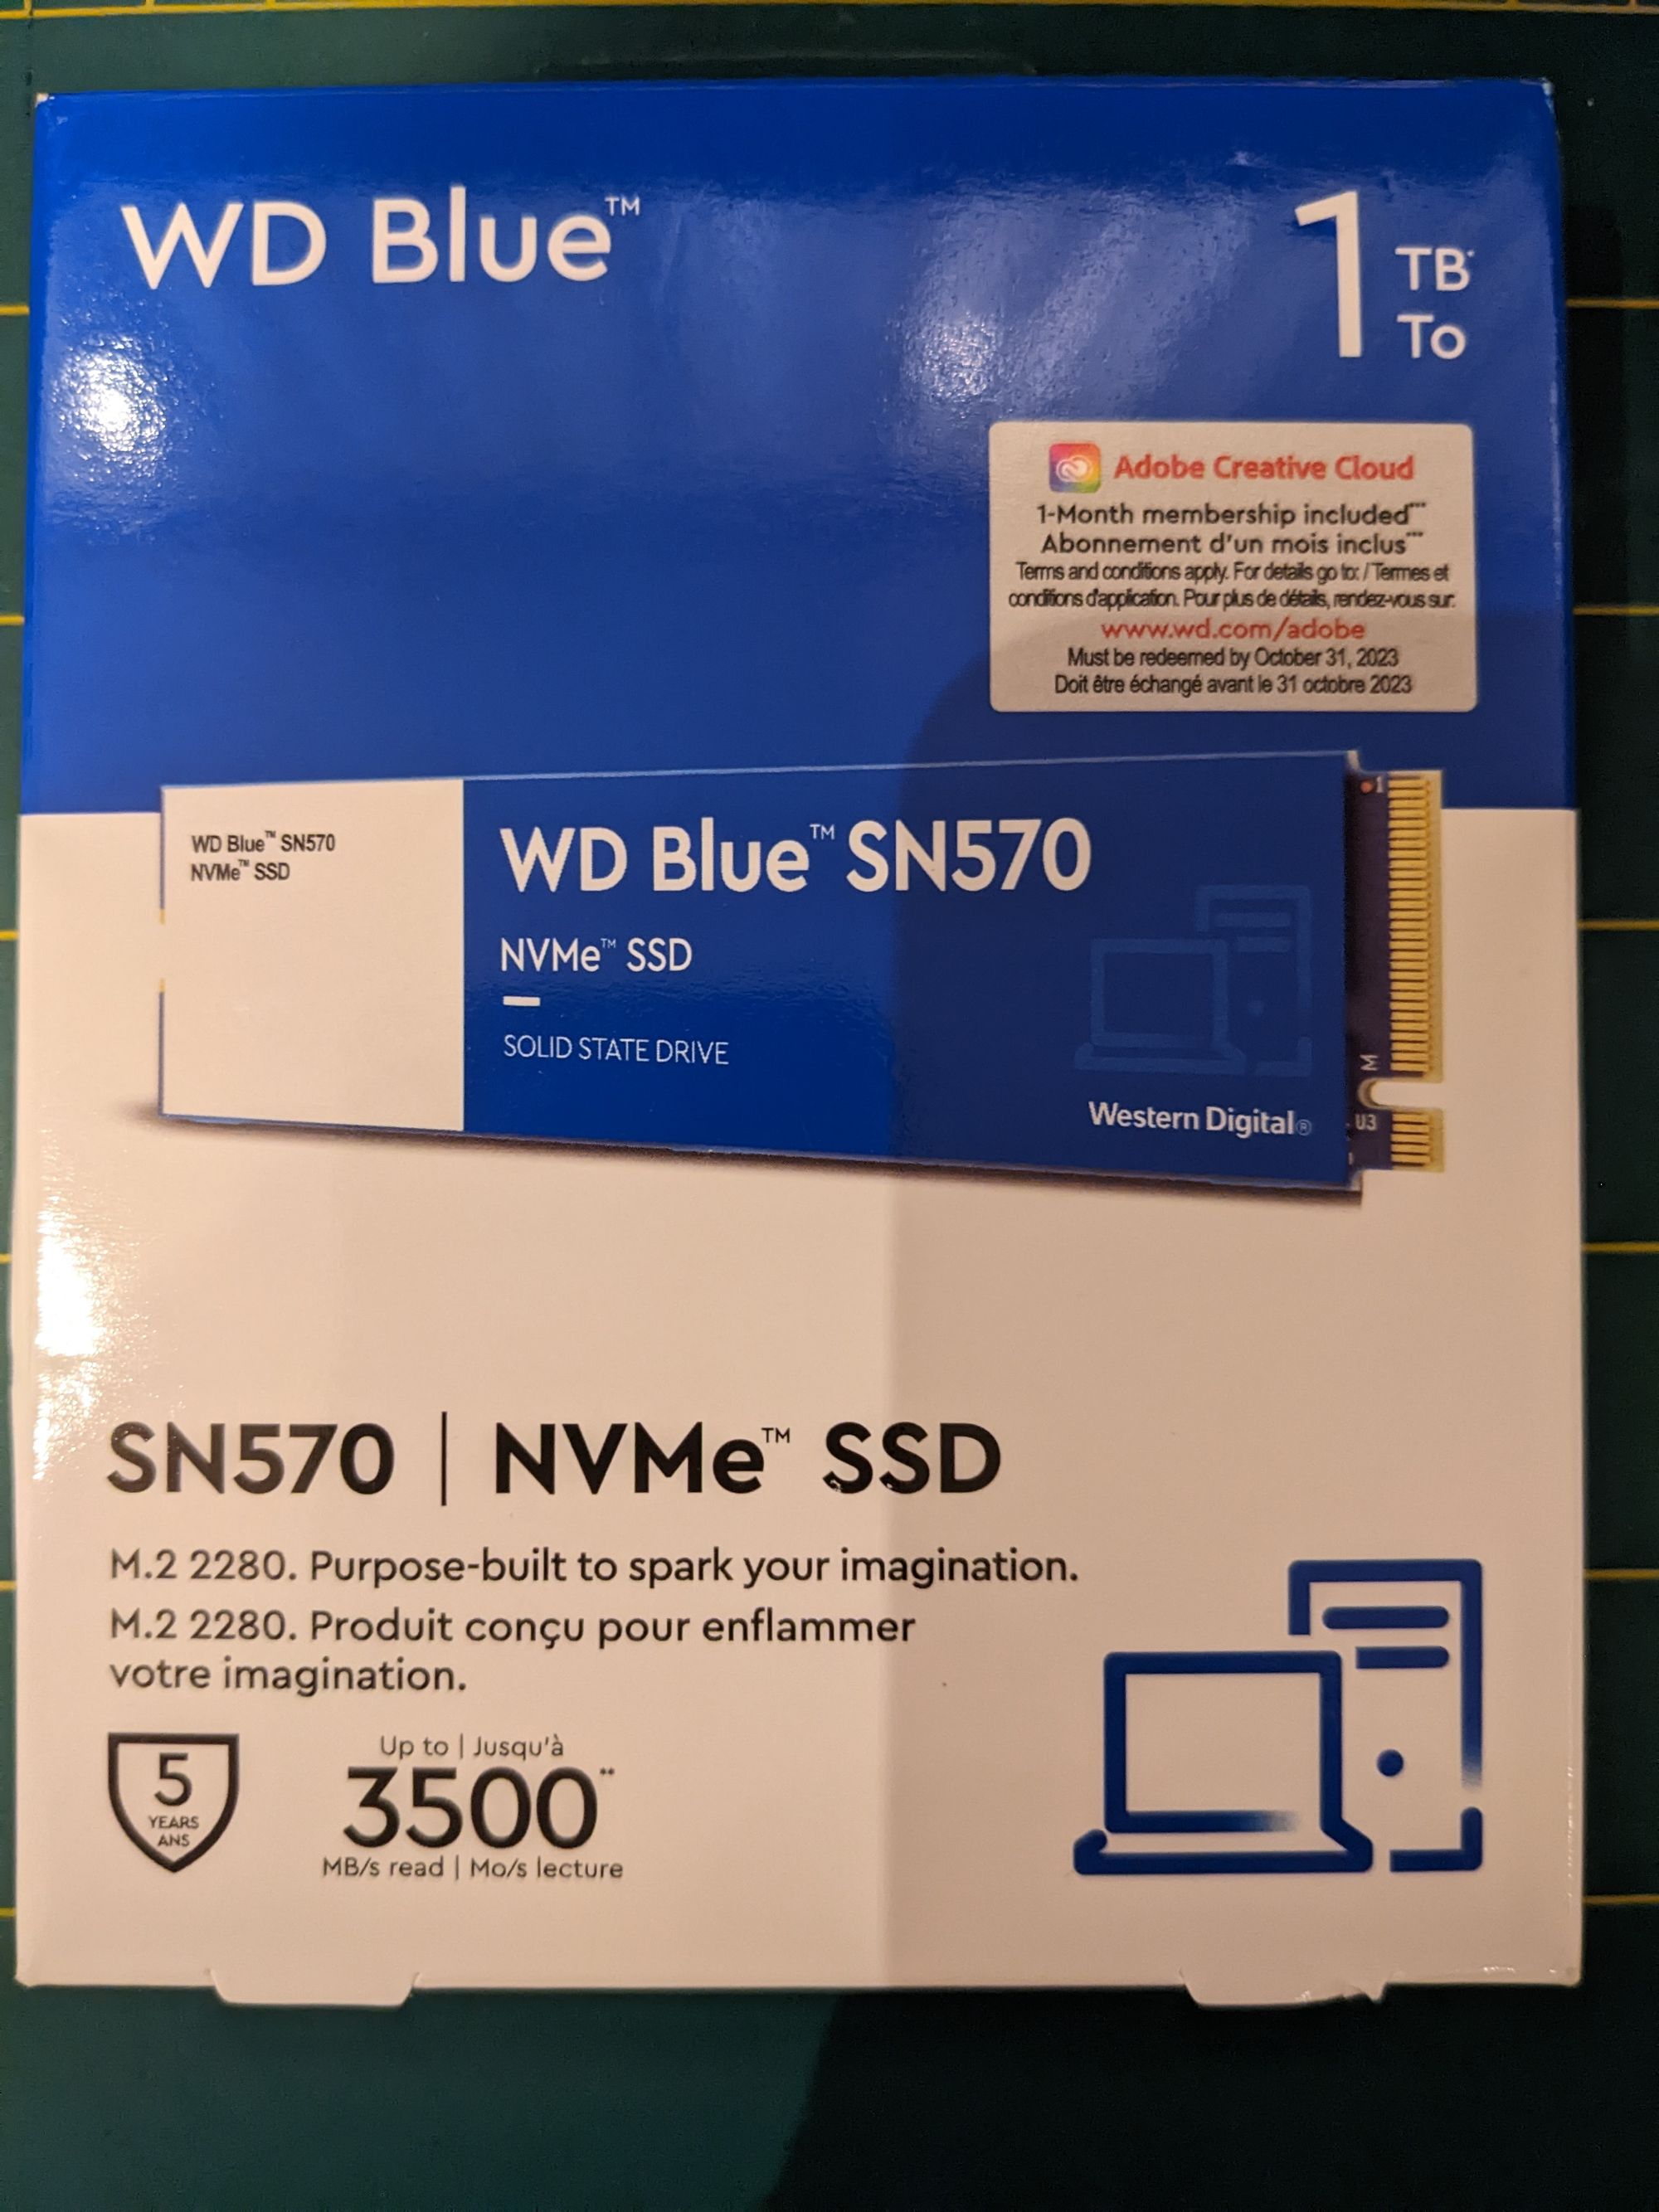
I added a WD Blue SN570 NVMe SSD</p>

<p><img src="/assets/images/2022/11/PXL_20221012_170907869.jpg" alt="" /><img src="/assets/images/2022/11/PXL_20221013_065307207.jpg" alt="" /></p>

<p>After boot up, create user account, set basics like name, timezone, currency etc.<br />
Then go to Storage settings and move data to new drive by selecting option from the meatball/kebab menu.</p>

<h3 id="zones">Zones</h3>

<p>Created zones for work and home addresses, they will be used to see if the home is occupied.
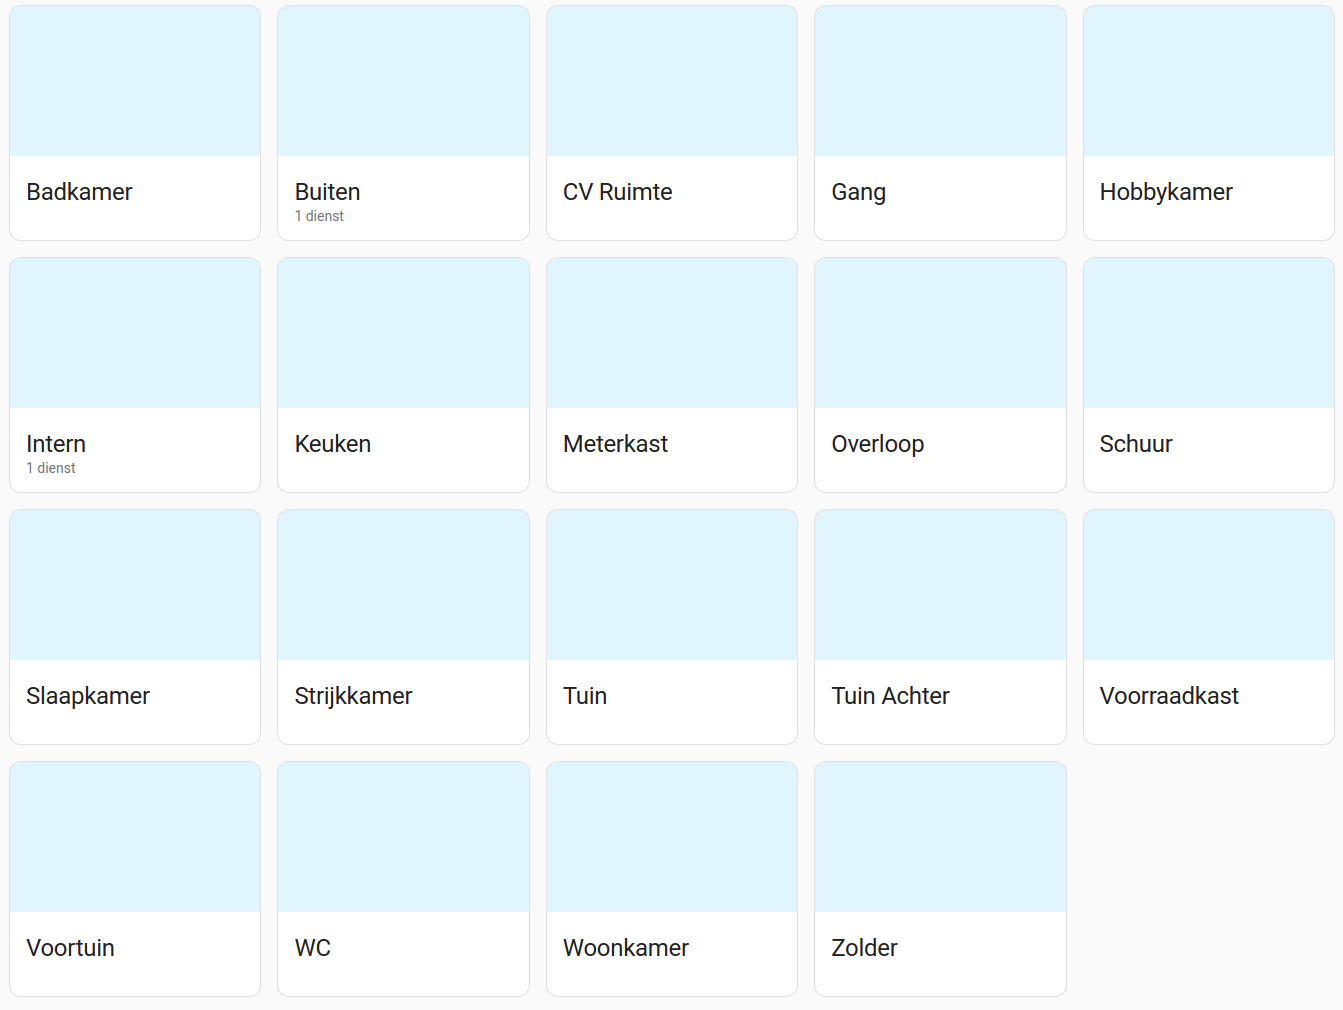
</p>

<h3 id="rooms">Rooms</h3>

<p>Created the rooms I need.</p>

<p><img src="/assets/images/2022/11/image.png" alt="" /></p>

<h3 id="add-ons">Add-ons</h3>

<p>I installed the following add-ons, most of them are straightforward to install.</p>

<p><img src="/assets/images/2022/11/image-7.png" alt="" /></p>

<h3 id="add-on-dsmr-reader">Add-on DSMR-Reader</h3>

<p>Logs my utility meter readings (more on this configuration later) add this repository to add-ons: https://github.com/sanderdw/hassio-addons/</p>

<div class="language-plaintext highlighter-rouge"><div class="highlight"><pre class="highlight"><code>WEBSERVER: Ingress
DSMRREADER_ADMIN_USER: admin
DSMRREADER_ADMIN_PASSWORD: &lt;secret&gt;
DJANGO_DATABASE_NAME: dsmrreader
DJANGO_DATABASE_USER: postgres
DJANGO_DATABASE_PASSWORD: &lt;secret&gt;
DJANGO_DATABASE_HOST: 77b2833f-timescaledb
DJANGO_DATABASE_PORT: "5432"
DSMRREADER_REMOTE_DATALOGGER_MODE: standalone
DSMRREADER_REMOTE_DATALOGGER_API_HOSTS: http(s)://&lt;YOUR_DSMR_HOST&gt;:&lt;PORT&gt;
DSMRREADER_REMOTE_DATALOGGER_API_KEYS: &lt;YOUR_API_KEY&gt;
DSMRREADER_REMOTE_DATALOGGER_SERIAL_PORT: /dev/ttyUSB1
DSMRREADER_REMOTE_DATALOGGER_INPUT_METHOD: serial
DSMRREADER_REMOTE_DATALOGGER_SERIAL_BAUDRATE: "115200"
DSMRREADER_REMOTE_DATALOGGER_NETWORK_HOST: x.x.x.x
DSMRREADER_REMOTE_DATALOGGER_NETWORK_PORT: x
DSMRREADER_REMOTE_DATALOGGER_SLEEP: "0.5"
DSMRREADER_LOGLEVEL: ERROR
DJANGO_FORCE_SCRIPT_NAME: ""
DJANGO_STATIC_URL: static/
</code></pre></div></div>

<h3 id="add-on-timescaledb">Add-on TimeScaleDB</h3>

<p>Is the PostgreSQL database engine used by DSMR-Reader, I also store Home Assistant data in a PostgreSQL database instead of the default SQLite. Add this repository to get this and the pgAdmin4 management tool: https://github.com/Expaso/hassos-addons</p>

<div class="language-plaintext highlighter-rouge"><div class="highlight"><pre class="highlight"><code>databases:
  - homeassistant
  - dsmrreader
timescale_enabled:
  - homeassistant
  - dsmrreader
timescaledb:
  telemetry: basic
  maxmemory: 512MB
  maxcpus: 4
max_connections: 20
system_packages: []
init_commands: []
retry_upgrade: false
</code></pre></div></div>

<h3 id="add-on-wireguard">Add-on WireGuard</h3>

<p>Handy VPN tool.</p>

<div class="language-plaintext highlighter-rouge"><div class="highlight"><pre class="highlight"><code>peers:
  - addresses:
      - 172.27.xx.x
    allowed_ips: []
    client_allowed_ips: []
    name: &lt;secret&gt;
server:
  addresses:
    - 172.27.xx.x
  dns: []
  host: &lt;secret url&gt;
</code></pre></div></div>

<h3 id="add-on-esphome">Add-on ESPHome</h3>

<p>Nice platform to program and control ESP board and other devices.</p>

<h3 id="add-on-studio-code-server">Add-on Studio Code Server</h3>

<p>Great editor, including syntax checks and variable lookup amoung other useful features.</p>

<h3 id="packages">Packages</h3>

<p>I choose to use the ‘packages’ way of organizing the .yaml files to configure home assistant.</p>

<p>Create a directory ‘packages’ inside /config, this will hold all .yaml files.</p>

<div class="language-plaintext highlighter-rouge"><div class="highlight"><pre class="highlight"><code># Load config from packages directory
homeassistant:
  packages: !include_dir_named packages
</code></pre></div></div>

<p><em>The file secrets.yaml</em> will hold all credentials and other sensitive values.</p>

<h3 id="added-via-yaml">Added via yaml</h3>

<p>Twitter Notify<br />
Huisbot<br />
HVC<br />
WAQI<br />
Workday<br />
Twitch</p>

<h3 id="added-via-gui">Added via GUI</h3>

<p>Google Maps Reistijd</p>

<p><em>Reistijd van Huis naar Werk<br />
Reistijd van Werk naar Huis</em></p>

<p>Created Google Distance Matrix API, add API key to <em>secrets.yaml</em><br />
Disable Automatic Polling<br />
Added automation to only poll during weekdays</p>

<p>Buienradar<br />
Ring<br />
Broadcom IR<br />
 <em>RMMINI-TELECOM-SICHUAN-50-9b-18 2.4Ghz WiFi</em><br />
Vervaldatum Certificaat<br />
Maan<br />
KNX<br />
SQL</p>

<h3 id="added-via-hacs">Added via HACS</h3>

<p>HVC Groep<br />
PowerCalc<br />
Arpscan Device Tracker Component<br />
iPhone Device Tracker<br />
Toon Climate<br />
Toon Boilerstats<br />
Toon Smartmeter<br />
Garmin Connect</p>]]></content><author><name>Ron</name></author><summary type="html"><![CDATA[I use Home Assistant for quite some years now, started to run it on a Raspberry Pi, a NUC, later went for Home Assistant Blue, and recently bought a Home Assistant Yellow, specially for the built-in radio's and faster Raspberry CM4 module. https://www.raspberrypi.com/documentation/computers/compute-module.html I could move over my installation vie the backup-restore method, but I want to document things, clean up unused code, and maybe improve older integrations. (by adding unique id's, Config]]></summary></entry><entry><title type="html">Quick webserver for Toon Home Assistant development</title><link href="https://cyberjunky.nl/quick-webserver-for-toon-home-assistent-development/" rel="alternate" type="text/html" title="Quick webserver for Toon Home Assistant development" /><published>2023-12-23T17:42:30+00:00</published><updated>2023-12-23T17:42:30+00:00</updated><id>https://cyberjunky.nl/quick-webserver-for-toon-home-assistent-development</id><content type="html" xml:base="https://cyberjunky.nl/quick-webserver-for-toon-home-assistent-development/"><![CDATA[<div class="language-plaintext highlighter-rouge"><div class="highlight"><pre class="highlight"><code>import http.server
import socketserver
from http import HTTPStatus

class MyServer(http.server.SimpleHTTPRequestHandler):
    
    def do_GET(self):
        
        # toon_smartmeter
        if self.path == '/hdrv_zwave?action=getDevices.json':
            filename = "getDevices.json"
        # toon_climate
        elif self.path == '/happ_thermstat?action=getThermostatInfo':
            filename = "getThermostatInfo.json"
        
        if self.path:
            try:
                f = open(filename, 'rb')
            except OSError:
                self.send_error(HTTPStatus.NOT_FOUND, "File not found")
                return None

            self.send_response(200)
            self.send_header("Content-type", "text/javascript")
            self.end_headers()

            try:
                self.copyfile(f, self.wfile)
            finally:
                f.close()
        else:
            super().do_GET()

# Main
handler_object = MyServer
PORT = 8080

print(f'Started listening on port {PORT}')

try:
    socketserver.TCPServer.allow_reuse_address = True
    my_server = socketserver.TCPServer(("", PORT), handler_object)
    my_server.serve_forever()

finally:
    print('Closing')
    my_server.server_close()
</code></pre></div></div>]]></content><author><name>Ron</name></author><summary type="html"><![CDATA[import http.server import socketserver from http import HTTPStatus class MyServer(http.server.SimpleHTTPRequestHandler): def do_GET(self): # toon_smartmeter if self.path == '/hdrv_zwave?action=getDevices.json': filename = "getDevices.json" # toon_climate elif self.path == '/happ_thermstat?action=getThermostatInfo': filename = "getThermostatInfo.json" if self.path: try: f = open]]></summary></entry><entry><title type="html">How to install Wallabag on Debian</title><link href="https://cyberjunky.nl/how-to-install-wallabag-on-debian/" rel="alternate" type="text/html" title="How to install Wallabag on Debian" /><published>2023-12-23T17:23:07+00:00</published><updated>2023-12-23T17:23:07+00:00</updated><id>https://cyberjunky.nl/how-to-install-wallabag-on-debian</id><content type="html" xml:base="https://cyberjunky.nl/how-to-install-wallabag-on-debian/"><![CDATA[<p>Was looking for a tool to store my bookmarks and items to read. Did this by sending myself e-mails which was not very clean…</p>

<p>I opted to move to Wallabag, so installed it on a VPS like so.</p>

<p>Install Debian 12, with minimal installation and SSH terminal selected.</p>

<p>Wallabag needs <strong>PHP</strong> and <strong>Nginx</strong></p>

<div class="language-plaintext highlighter-rouge"><div class="highlight"><pre class="highlight"><code>su -
apt install sudo
adduser user sudo
sudo apt update &amp;&amp; sudo apt upgrade

sudo apt install git make composer
sudo apt install php-fpm php-mysql php-bcmath php-xml php-zip php-curl php-mbstring php-gd php-tidy php-tokenizer nginx composer  sqlite3 php-sqlite3 certbot python3-certbot-nginx

sudo mkdir -p /var/www/wallabag.cyberjunky.nl/{public_html,logs}
sudo vi /etc/nginx/sites-available/wallabag.cyberjunky.nl

server {
server_name wallabag.cyberjunky.nl; # Change this to fit your needs
root /var/www/wallabag.cyberjunky.nl/public_html/web;
access_log /var/www/wallabag.cyberjunky.nl/logs/access.log;
error_log /var/www/wallabag.cyberjunky.nl/logs/error.log;
location / {
    try_files $uri /app.php$is_args$args;
}
location ~ ^/app\.php(/|$) {
    fastcgi_pass unix:/run/php/php8.2-fpm.sock; # Change this to fit your needs
    fastcgi_split_path_info ^(.+\.php)(/.*)$;
    include fastcgi_params;
    fastcgi_param  SCRIPT_FILENAME  $realpath_root$fastcgi_script_name;
    fastcgi_param DOCUMENT_ROOT $realpath_root;
    internal;
}
}

sudo ln -s /etc/nginx/sites-available/wallabag.cyberjunky.nl /etc/nginx/sites-enabled/wallabag.cyberjunky.nl

sudo git clone https://github.com/wallabag/wallabag.git /var/www/wallabag.cyberjunky.nl/public_html/

sudo chown -R www-data:www-data /var/www/wallabag.cyberjunky.nl
sudo -u www-data /bin/bash

cd /var/www/wallabag.cyberjunky.nl/public_html/ &amp;&amp; make install
</code></pre></div></div>

<p>Give these answers:</p>

<div class="language-plaintext highlighter-rouge"><div class="highlight"><pre class="highlight"><code>database_driver (pdo_mysql): pdo_sqlite 
database_driver_class (null): 
database_host (127.0.0.1): 
database_port (null): 
database_name (wallabag): 
database_user (root): 
database_password (null): 
database_path (null): /var/www/wallabag.cyberjunky.nl/data
database_table_prefix (wallabag_): 
database_socket (null): 
database_charset (utf8mb4): 
domain_name ('https://your-wallabag-url-instance.com'): https://wallabag.cyberjunky.nl
mailer_transport (smtp): 
mailer_host (127.0.0.1): smtp.gmail.com
mailer_user (null): user@gmail.com
mailer_password (null): user-password
locale (en): 
secret (ovmpmAWXRCabNlMgzlzSGwdstrghGv): 
twofactor_auth (true): false
twofactor_sender (no-reply@wallabag.org): user@gmail.com
fosuser_registration (true): 
fosuser_confirmation (true):      
from_email (no-reply@wallabag.org): user@gmail.com
rss_limit (50): 
rabbitmq_host (localhost): 
rabbitmq_port (5672): 
rabbitmq_user (guest): 
rabbitmq_password (guest): 
rabbitmq_prefetch_count (10): 
redis_scheme (tcp): 
redis_host (localhost): 
redis_port (6379): 
redis_path (null): 
redis_password (null):
</code></pre></div></div>

<p>Reply yes, when asked to reset the database, and create the admin user.</p>

<div class="language-plaintext highlighter-rouge"><div class="highlight"><pre class="highlight"><code>ctrl-c
sudo certbot --nginx -d wallabag.cyberjunky.nl
sudo systemctl restart nginx
</code></pre></div></div>]]></content><author><name>Ron</name></author><summary type="html"><![CDATA[Was looking for a tool to store my bookmarks and items to read. Did this by sending myself e-mails which was not very clean... I opted to move to Wallabag, so installed it on a VPS like so. Install Debian 12, with minimal installation and SSH terminal selected. Wallabag needs PHP and Nginx su - apt install sudo adduser user sudo sudo apt update && sudo apt upgrade sudo apt install git make composer sudo apt install php-fpm php-mysql php-bcmath php-xml php-zip php-curl php-mbstring php-gd ph]]></summary></entry><entry><title type="html">Hosting a Ghost blog on Google Cloud</title><link href="https://cyberjunky.nl/hosting-a-ghost-blog-on-google-cloud/" rel="alternate" type="text/html" title="Hosting a Ghost blog on Google Cloud" /><published>2022-11-11T15:25:50+00:00</published><updated>2022-11-11T15:25:50+00:00</updated><id>https://cyberjunky.nl/hosting-a-ghost-blog-on-google-cloud</id><content type="html" xml:base="https://cyberjunky.nl/hosting-a-ghost-blog-on-google-cloud/"><![CDATA[<p>I switched from the paid (although cheap) AWS Lightsail to Google Compute Engine for hosting this blog.</p>

<p><img src="/assets/images/2022/11/Screenshot-from-2022-11-10-15-31-46.png" alt="" /></p>

<p>NOTE: I bought the support for one month to get support on disabling DNSSEC<br />
I hope to run the Google Cloud VM Instance for free (using the monthly credits)</p>

<p>The difference between this instance and the old one which ran at AWS is also a newer Debian distribution 11, and Ghost 5 instead of Ghost 3.</p>

<table>
  <tbody>
    <tr>
      <td>[Compute Engine: Virtual Machines (VMs)</td>
      <td>Google Cloud</td>
    </tr>
  </tbody>
</table>

<p>Compute Engine delivers configurable virtual machines running in Google’s data centers with access to high-performance</p>

<p><img src="https://www.gstatic.com/devrel-devsite/prod/v8b5224dd5a12318d5f6ab78c52530208ebc55112b691b517d54e8b153c58ecd1/cloud/images/favicons/onecloud/super_cloud.png" alt="" />Google Cloud</p>

<p><img src="https://cloud.google.com/_static/cloud/images/social-icon-google-cloud-1200-630.png" alt="" />](https://cloud.google.com/compute)</p>

<p>Google has free micro instances:</p>

<p><em>“All customers get a general purpose machine (e2-micro instance) per month for free, not charged against your credits.”</em></p>

<p>This is what i selected:</p>

<p>Zone: europe-west4-a<br />
Machine type: e2-micro x86/64<br />
Image: debian-11-bullseye-v20220920<br />
Disk: Standard persistent disk</p>

<p>Old entry based in US, just for reference:</p>

<p><img src="/assets/images/2022/11/Screenshot-from-2022-11-10-14-35-02.png" alt="" /><img src="/assets/images/2022/11/Screenshot-from-2022-11-10-15-15-29.png" alt="" /></p>

<p>Don’t forget to remove RDP and SSH from default firewall rules.</p>

<p>After creation, connect with web SSH terminal<br />
If you want to connect with local SSH client and/or WinSCP import the key.</p>

<h3 id="update-os">Update OS</h3>

<div class="language-plaintext highlighter-rouge"><div class="highlight"><pre class="highlight"><code>vi update.sh

#!/bin/bash
sudo apt-get update
sudo apt-get upgrade
sudo apt-get autoclean
sudo apt-get clean
sudo apt-get autoremove
&gt;~/.bash_history
history -c

chmod +x update.sh
./update.sh
</code></pre></div></div>

<h3 id="install-docker">Install Docker</h3>

<p><a href="https://docs.docker.com/engine/install/debian/">https://docs.docker.com/engine/install/debian/</a></p>

<div class="language-plaintext highlighter-rouge"><div class="highlight"><pre class="highlight"><code>curl -fsSL https://get.docker.com -o get-docker.sh
sudo sh get-docker.sh
</code></pre></div></div>

<p>[this can takes some time]</p>

<div class="language-plaintext highlighter-rouge"><div class="highlight"><pre class="highlight"><code>sudo usermod -aG docker ${USER}
</code></pre></div></div>

<h3 id="install-docker-compose">Install docker compose</h3>

<div class="language-plaintext highlighter-rouge"><div class="highlight"><pre class="highlight"><code>sudo curl -SL https://github.com/docker/compose/releases/download/v2.12.2/docker-compose-linux-x86_64 -o /usr/local/bin/docker-compose
sudo chmod +x /usr/local/bin/docker-compose
</code></pre></div></div>

<p>Now disconnect and reconnect to activate new group membership</p>

<h3 id="caddy-and-ghost-installation">Caddy and Ghost installation</h3>

<p>I choose <code class="language-plaintext highlighter-rouge">/home/${USER}/docker</code> as docker’s base directory.</p>

<div class="language-plaintext highlighter-rouge"><div class="highlight"><pre class="highlight"><code>mkdir -p ~/docker/caddy/data
mkdir -p ~/docker/caddy/config
cd ~/docker

vi caddy/Caddyfile

{
    # Global options block. Entirely optional, https is on by default
    # Optional email key for lets encrypt
    email your@email.address
    # Optional staging lets encrypt for testing. Comment out for production.
    # acme_ca https://acme-staging-v02.api.letsencrypt.org/directory
}
yoursite.com {
    reverse_proxy ghost:2368
}
www.yoursite.nl {
    redir https://yoursite.com{uri}
}


vi docker-compose.yaml

services:
        caddy:
                image: caddy:2-alpine
                restart: always
                container_name: caddy
                ports:
                        - 443:443
                volumes:
                        - ./caddy/Caddyfile:/etc/caddy/Caddyfile
                        - ./caddy/data:/data
                        - ./caddy/config:/config
                labels:
                        - com.centurylinklabs.watchtower.enable=true

        ghost:
                image: ghost:5-alpine
                restart: always
                container_name: ghost
                ports:
                        - 2368:2368
                volumes:
                        - ./ghost/data:/var/lib/ghost/content
                environment:
                        - NODE_ENV=production
                        - url=https://yoursite.com
                        - database__client=sqlite3
                        - database__connection__filename="content/data/ghost.db"
                        - database__useNUllAsDefault=true
                        - database__debug=False
                labels:
                        - com.centurylinklabs.watchtower.enable=true

        watchtower:
        		image: v2tec/watchtower
                restart: always
                container_name: watchtower
                volumes:
                        - /var/run/docker.sock:/var/run/docker.sock
                labels:
                        - com.centurylinklabs.watchtower.enable=true
                command: --schedule "0 0 4 * * *" --cleanup --label-enable
</code></pre></div></div>

<p>As you can see I also install and run Watchtower to keep the images up to date.</p>

<p>Now you can start them with:</p>

<div class="language-plaintext highlighter-rouge"><div class="highlight"><pre class="highlight"><code>docker-compose start -d
</code></pre></div></div>

<h3 id="backups">Backups</h3>

<div class="language-plaintext highlighter-rouge"><div class="highlight"><pre class="highlight"><code>#!/bin/bash
backup_path="/home/ron/backup"
tar_opts="--exclude='/var/run/*' --exclude='/home/ron/backup/*' --exclude='/home/ron/backup-server.tar.gz' --exclude='/home/ron/docker/ghost/data/logs/*'"
cd "${BASH_SOURCE%/*}" || exit
rm -rf $backup_path
mkdir -p $backup_path
cp backup.sh update.sh $backup_path

for i in `docker inspect --format='{{.Name}}' $(docker ps -qa) | cut -f2 -d\/`
  do container_name=$i
  mkdir -p $backup_path/$container_name
  echo -n "$container_name - "
  docker run --rm \
    --volumes-from $container_name \
    -v $backup_path:/backup \
    -e TAR_OPTS="$tar_opts" \
    piscue/docker-backup \
    backup "$container_name/$container_name-volume.tar.xz"
  echo "OK"
done

tar -czvf ./backup-server.tar.gz --exclude=".[^/]*" ./backup
rm -rf $backup_path
</code></pre></div></div>]]></content><author><name>Ron</name></author><summary type="html"><![CDATA[I switched from the paid (although cheap) AWS Lightsail to Google Compute Engine for hosting this blog. NOTE: I bought the support for one month to get support on disabling DNSSEC I hope to run the Google Cloud VM Instance for free (using the monthly credits) The difference between this instance and the old one which ran at AWS is also a newer Debian distribution 11, and Ghost 5 instead of Ghost 3. Compute Engine: Virtual Machines (VMs) | Google CloudCompute Engine delivers configurable virtu]]></summary></entry><entry><title type="html">Geigercounter with KNX IP</title><link href="https://cyberjunky.nl/geigercounter-with-knx-ip/" rel="alternate" type="text/html" title="Geigercounter with KNX IP" /><published>2022-11-11T14:21:48+00:00</published><updated>2022-11-11T14:21:48+00:00</updated><id>https://cyberjunky.nl/geigercounter-with-knx-ip</id><content type="html" xml:base="https://cyberjunky.nl/geigercounter-with-knx-ip/"><![CDATA[<p>Having a KNX IP backbone with IP routers working I wanted to see if I can build some DIY sensors using it, and check if this is a stable solution for non-critical use cases.</p>

<p>After building a module using ESPHome, I thought of converting it using KNX IP (ie. broadcast over WiFi to a broadcast address to report sensor values)</p>

<p>Install Arduino IDE if not done yet.</p>

<p>Go to <a href="https://www.arduino.cc/en/software">https://www.arduino.cc/en/software</a> and download version for your OS.</p>

<p>On Linux do not install via <em>sudo apt install Arduino</em>, it’s old!</p>

<p>Unpack the archive and run <em>sudo ./install.sh</em> from it.</p>

<p>Next, open Arduino IDE and go to [File =&gt; Preferences]. A dialog box appears. In this box, an additional board manager URL text box is present.</p>

<ul>
  <li>Copy and paste the following URL into the box and click OK to download the packages.</li>
  <li><a href="http://arduino.esp8266.com/stable/package_esp8266com_index.json">http://arduino.esp8266.com/stable/package_esp8266com_index.json</a></li>
  <li>Go to board manager and look for esp8266, install it.</li>
  <li>Then select board Wemo D1 from the board’s menu.</li>
</ul>

<p>Now we need to install the esp-knx-ip library.</p>

<p>Go to the GitHub page and under releases download the zip, I have version <a href="https://github.com/envy/esp-knx-ip/archive/0.4.0.zip">https://github.com/envy/esp-knx-ip/archive/0.4.0.zip</a></p>

<p>[envy/esp-knx-ip</p>

<p>A KNX/IP library for the ESP8266 with Arduino. Contribute to envy/esp-knx-ip development by creating an account on GitHub.</p>

<p><img src="https://github.githubassets.com/favicons/favicon.svg" alt="" />GitHubenvy</p>

<p><img src="https://avatars0.githubusercontent.com/u/241552?s=400&amp;v=4" alt="" />](https://github.com/envy/esp-knx-ip)</p>

<ul>
  <li>Open Sketch menu Library menu, select Include Library and Add .ZIP Library</li>
  <li>Select downloaded archive</li>
</ul>

<p>Do the same with the ESP8266 library from here, <a href="https://github.com/esp8266/Arduino/releases/download/2.7.4/esp8266-2.7.4.zip">https://github.com/esp8266/Arduino/releases/download/2.7.4/esp8266-2.7.4.zip</a></p>

<ul>
  <li>Open Boards manager and install <em>esp8266</em></li>
</ul>

<p>[esp8266/Arduino</p>

<p>ESP8266 core for Arduino. Contribute to esp8266/Arduino development by creating an account on GitHub.</p>

<p><img src="https://github.githubassets.com/favicons/favicon.svg" alt="" />GitHubesp8266</p>

<p><img src="https://avatars0.githubusercontent.com/u/8943775?s=400&amp;v=4" alt="" />](https://github.com/esp8266/Arduino)</p>]]></content><author><name>Ron</name></author><summary type="html"><![CDATA[Having a KNX IP backbone with IP routers working I wanted to see if I can build some DIY sensors using it, and check if this is a stable solution for non-critical use cases. After building a module using ESPHome, I thought of converting it using KNX IP (ie. broadcast over WiFi to a broadcast address to report sensor values) Install Arduino IDE if not done yet. Go to https://www.arduino.cc/en/software and download version for your OS. On Linux do not install via sudo apt install Arduino, it's]]></summary></entry><entry><title type="html">Installing Proxmox on a Intel NUC</title><link href="https://cyberjunky.nl/installing-proxmox-on-nuc8/" rel="alternate" type="text/html" title="Installing Proxmox on a Intel NUC" /><published>2022-11-11T14:21:26+00:00</published><updated>2022-11-11T14:21:26+00:00</updated><id>https://cyberjunky.nl/installing-proxmox-on-nuc8</id><content type="html" xml:base="https://cyberjunky.nl/installing-proxmox-on-nuc8/"><![CDATA[<p>I installed Proxmox on a spare NUC8 to run all kind of things and get Proxmox experience.</p>

<h3 id="hardware">Hardware</h3>

<ul>
  <li>Intel NUC with at least 8 GB of memory plus required VM memory size, I use 32 GB.</li>
  <li>Make sure you have enough hard-drive space. I use a 256 GB SSD.</li>
  <li>BIOS boot and hit F2 to enter. Look for boot order and boot devices. Make sure USB boot is priority. Also make sure you enabled virtualization features of the processor.</li>
</ul>

<h3 id="prepare-installation-medium">Prepare Installation Medium</h3>

<p>Download latest Proxmox image from <a href="https://www.proxmox.com/en/downloads/category/iso-images-pve">this site</a>.</p>

<p><em>Proxmox 6.3-1 at time of writing.</em></p>

<p>You need a USB stick with at least 1 GB size, write the ISO image to it using, Balena, Rufus etc.</p>

<p><img src="/assets/images/2021/02/flashusb.png" alt="" /></p>

<h3 id="install">Install</h3>

<ul>
  <li>Boot NUC from this USB stick.</li>
  <li>Select your Country, Keyboard layout and Time-zone.</li>
  <li>Choose the hard-drive where you want to install Proxmox on.</li>
  <li>Set the root password. (DON’T LOSE IT!) and fill in your email address for alerts.</li>
  <li>You can also specify a host name and network settings.</li>
  <li>Install and reboot after installation is done.</li>
  <li>Login to Proxmox web interface at https://your_ip:8006.</li>
</ul>

<h3 id="configuration">Configuration</h3>

<p>In order to get new images you need a valid repository. Given you have no subscription we are adding the pve-no-subscription repository.</p>

<p>Login with SSH to your PVE server, rename pve-enterprise.list to pve-no-subscripton.list and change contents.</p>

<p>Comment line in pve-enterprise.list and check with running <code class="language-plaintext highlighter-rouge">apt-get update</code></p>

<div class="language-plaintext highlighter-rouge"><div class="highlight"><pre class="highlight"><code># cd /etc/apt/sources.list
# mv pve-enterprise.list pve-no-subscription.list

# vi pve-no-subscription.list
deb http://download.proxmox.com/debian/pve bullseye pve-no-subscription
</code></pre></div></div>

<h3 id="update">Update</h3>

<p>Navigate to Updates menu, click Upgrade, after update run, click on Reboot.</p>

<p><img src="/assets/images/2021/02/p2.png" alt="" /></p>

<div class="language-plaintext highlighter-rouge"><div class="highlight"><pre class="highlight"><code>Running hooks in /etc/ca-certificates/update.d...
done.

Your System is up-to-date


Seems you installed a kernel update - Please consider rebooting
this node to activate the new kernel.

starting shell
root@pve:/#
</code></pre></div></div>

<h3 id="creating-your-first-vm">Creating your first VM</h3>

<p>Download an OS image for example Debian 10 net-install from <a href="https://www.debian.org/CD/netinst/">this site</a>.</p>

<p>I used Debian 10.8.0 (amd64) at time of writing.<br />
Upload the ISO.</p>

<p><img src="/assets/images/2021/02/image-6.png" alt="" /></p>

<div class="language-plaintext highlighter-rouge"><div class="highlight"><pre class="highlight"><code>Running hooks in /etc/ca-certificates/update.d...
done.

Your System is up-to-date


Seems you installed a kernel update - Please consider rebooting
this node to activate the new kernel.

starting shell
root@pve:/#
</code></pre></div></div>

<h3 id="adding-extra-disk-for-smb-share">Adding extra disk for SMB share</h3>

<p>I added another 1GB SSD stick to be used as NAS.</p>

<p>If disk contains a partition it’s not displayed as unused in GUI.</p>

<div class="language-plaintext highlighter-rouge"><div class="highlight"><pre class="highlight"><code># dd if=/dev/zero bs=1k count=10 of=/dev/sdx
# gdisk /dev/sdx

	3 - Create blank GPT
	Write
</code></pre></div></div>

<p>Create ZFS zpool from GUI or using CLI</p>

<div class="language-plaintext highlighter-rouge"><div class="highlight"><pre class="highlight"><code># zpool create -o 'ashift=12' data /dev/disk/by-id/ata-WDC_WDS100T2B0B-00YS70_20406A803528

# zfs set mountpoint=/mnt/data data
# zfs set compression=lz4 data

# zpool list
NAME   SIZE  ALLOC   FREE  CKPOINT  EXPANDSZ   FRAG    CAP  DEDUP    HEALTH  ALTROOT
data   928G   138K   928G        -         -     0%     0%  1.00x    ONLINE  -

# zpool status
  pool: data
 state: ONLINE
config:

        NAME        STATE     READ WRITE CKSUM
        data        ONLINE       0     0     0
          sdb       ONLINE       0     0     0

# zfs list
NAME   USED  AVAIL     REFER  MOUNTPOINT
data   138K   899G       24K  /mnt/data
</code></pre></div></div>

<p>Install and configure Samba</p>

<div class="language-plaintext highlighter-rouge"><div class="highlight"><pre class="highlight"><code># apt install --no-install-recommends samba

# useradd -m user
# smbpasswd -a user

# adduser user sambashare

# chgrp -R sambashare /mnt/data
# chmod -R g+r /mnt/data

# cd /etc/samba
# mv smb.conf smb.conf.org
# vi smb.conf
[global]
        netbios name = SERVER
        workgroup = WORKGROUP
        server role = standalone server
        name resolve order = bcast host
        domain master = no
        case sensitive = no
        auto services = global
        bind interfaces only = yes
        disable netbios = no
        smb ports = 139 445
        log file = /var/log/samba/smb.log
        max log size = 1000
        load printers = no
        force group = sambashare

[data]
        path = /mnt/data
        browseable = yes
        read only = no
        delete readonly = yes
        valid users = @sambashare

# service smbd restart
</code></pre></div></div>]]></content><author><name>Ron</name></author><summary type="html"><![CDATA[I installed Proxmox on a spare NUC8 to run all kind of things and get Proxmox experience. Hardware * Intel NUC with at least 8 GB of memory plus required VM memory size, I use 32 GB. * Make sure you have enough hard-drive space. I use a 256 GB SSD. * BIOS boot and hit F2 to enter. Look for boot order and boot devices. Make sure USB boot is priority. Also make sure you enabled virtualization features of the processor. Prepare Installation Medium Download latest Proxmox image from this si]]></summary></entry><entry><title type="html">Move TTN Kickstarter LORA Gateway to V3 network</title><link href="https://cyberjunky.nl/move-ttn-gateway-to-v3/" rel="alternate" type="text/html" title="Move TTN Kickstarter LORA Gateway to V3 network" /><published>2021-06-25T14:27:44+00:00</published><updated>2021-06-25T14:27:44+00:00</updated><id>https://cyberjunky.nl/move-ttn-gateway-to-v3</id><content type="html" xml:base="https://cyberjunky.nl/move-ttn-gateway-to-v3/"><![CDATA[<p>Finally had some time to move my TTN gateway from V2 to V2 network. Here are the steps and screenshots.</p>

<p>Prerequisites:</p>
<ul>
  <li>Running v1.08 gateway firmware (beta)</li>
  <li>User account for TTN console (Community Edition)</li>
</ul>

<p>Visit <a href="https://www.thethingsindustries.com/docs/download/">https://www.thethingsindustries.com/docs/download/</a> for the options</p>

<ol>
  <li>Create a gateway in V3.<br />
a. Visit <a href="https://eu1.cloud.thethings.network/console/gateways/add">https://eu1.cloud.thethings.network/console/gateways/add</a> if you live in Europe.<br />
b. Give the gateway a name. (Gateway ID)<br />
c. Choose the frequency plan ‘Europe 863-870 MHz (SF9 for RX2 - recommended)’ I’m a Dutch guy.<br />
d. Save</li>
  <li>Goto V3 gateway API Settings<br />
a. Select Add API key<br />
b. Provide a name<br />
c. Select ‘Grant Individual Rights’<br />
d. Choose ‘Link as Gateway to a Gateway Server for traffic exchange, i.e. write uplink and read downlink<br />
e. Generate API key<br />
f.  Copy key to clipboard and store safely, you can only look at it now.<br />
g. Click ‘I have copied the key’</li>
  <li>Now we need to enter the new settings inside of the gateway<br />
a. Power cycle gateway with holding the pink reset button inside for 5 seconds.<br />
b. Browse to it’s local website to fill in the gateway settings (I use wired LAN, so I skip the WLAN part)<br />
c. In Account server field replace <a href="https://account.thethingsnetwork.org">https://account.thethingsnetwork.org</a> with the URL from V3 <a href="https://eu1.cloud.thethings.network/">https://eu1.cloud.thethings.network/</a><br />
d. At Gateway Key fill in the API key from 2f.<br />
e. Save</li>
</ol>

<p>After creation the new gateway show ‘Disconnected’:</p>

<p><img src="/assets/images/2021/06/Screenshot-from-2021-06-25-14-39-57.png" alt="" /></p>

<p>Filling in the new settings:</p>

<p><img src="/assets/images/2021/06/Screenshot-from-2021-06-25-14-40-56.png" alt="" /></p>

<p>The gateway will now restart and connect to the new V3 enviroment:</p>

<p><img src="/assets/images/2021/06/Screenshot-from-2021-06-25-14-40-26-1.png" alt="" /></p>

<p>A few moments later you will see it online, if all goes well:</p>

<p><img src="/assets/images/2021/06/Screenshot-from-2021-06-25-14-41-44.png" alt="" /></p>

<p>Success!</p>]]></content><author><name>Ron</name></author><category term="thethingsnetwork" /><category term="thethingsnetwork" /><category term="lora" /><category term="ttn" /><summary type="html"><![CDATA[Finally had some time to move my TTN gateway from V2 to V2 network. Here are the steps and screenshots. Prerequisites: - Running v1.08 gateway firmware (beta) - User account for TTN console (Community Edition) Visit https://www.thethingsindustries.com/docs/download/ for the options 1. Create a gateway in V3. a. Visit https://eu1.cloud.thethings.network/console/gateways/add if you live in Europe. b. Give the gateway a name. (Gateway ID) c. Choose the frequency plan 'Europe 863-870]]></summary></entry></feed>