Hosting a Ghost blog on AWS

I decided to switch to only using Home Assistant OS for running servers, I have an Intel NUC (development) and Home Assistant Blue (production), they run Home Assistant and do some file sharing and DSMR smartmeter energy readings.
Also VS Studio, TimeScaleDB (Postgres)
But I also run a personal blog (the one you are looking at now) at home for years on my home Linux server, I could port Ghost over to Home Assistant add-on but I wanted to experiment with AWS cloud as well.. If this can be done cheap. I know you can also run Ghost on GitHub Pages but then you always need an installation to write posts on and push pages to GitHub as commits, extra steps.
I opted for the smallest version of a AWS Lightsail instance, still a full blown Linux installation with limited resources. Added Route53 for DNS (switched from Version) to have one source.
Here the steps to get it going using Docker, Ghost and Caddy as proxy and Lets Encrypt client.
Create AWS account
https://portal.aws.amazon.com/billing/signup
Select billing with Creditcard for first Month, after first payment you can add a bank account if you want. (not tested yet)
Select a zone near you (Frankfurt for me)
Create Lightsail instance
https://lightsail.aws.amazon.com/ls/webapp/home/instances
I created a full blown Linux distro image to work in (not free, see below)
OS Only
Linux Debian 10.5
Frankfurt / eu-central-1
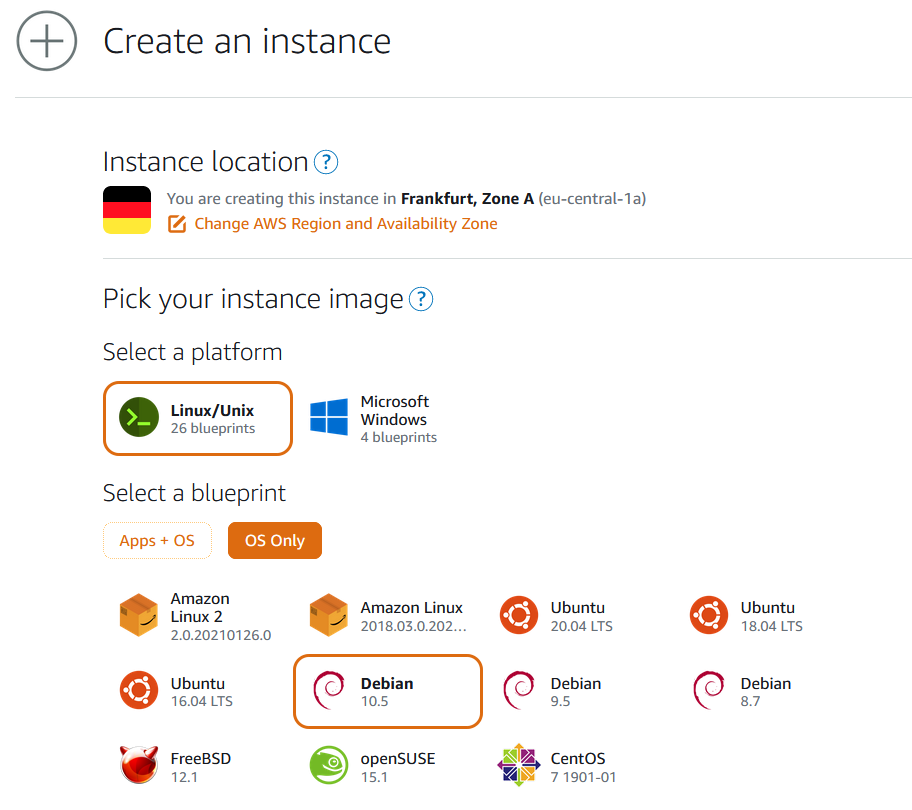
Create new SSH keypair (not free, see below) or use existing one.
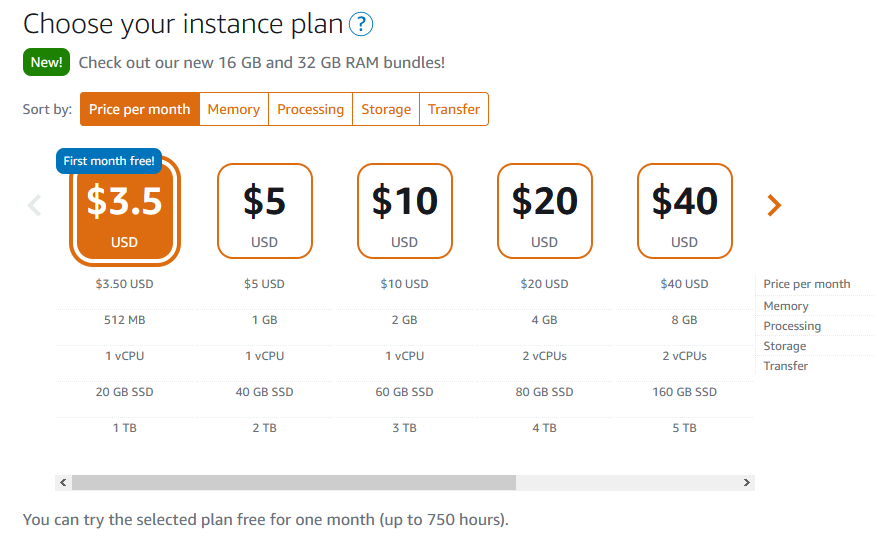
Choose 512 MB RAM, 1 vCPU, 20 GB SSD plan.
Instance name (must be unique)
BTW: You can always upgrade to a bigger instance by restoring a snapshot, but you cannot go backup smaller without a re-install.
Connect with web terminal
If you want to connect with local SSH client and/or WinSCP import the key you created.
Update OS
vi update.sh

#!/bin/bash
sudo apt-get update
sudo apt-get upgrade
sudo apt-get autoclean
sudo apt-get clean
sudo apt-get autoremove
>~/.bash_history
history -c

chmod +x update.sh
./update.sh
Install Docker
https://docs.docker.com/engine/install/debian/
curl -fsSL https://get.docker.com -o get-docker.sh
sudo sh get-docker.sh
[this can takes some time]
sudo usermod -aG docker admin
Now disconnect and reconnect to get new group membership
Caddy and Ghost installation
I choose /home/admin/docker as docker base directory.
mkdir -p ~/docker/caddy/data
mkdir -p ~/docker/caddy/config
cd ~/docker

vi Caddyfile

{
    # Global options block. Entirely optional, https is on by default
    # Optional email key for lets encrypt
    email your@email.address
    # Optional staging lets encrypt for testing. Comment out for production.
    # acme_ca https://acme-staging-v02.api.letsencrypt.org/directory
}
yoursite.com {
    reverse_proxy ghost:2368
}
www.yoursite.nl {
    redir https://yoursite.com{uri}
}


vi docker-compose.yaml

services:
        caddy:
                image: caddy:2-alpine
                restart: always
                container_name: caddy
                ports:
                        - 443:443
                volumes:
                        - ./caddy/Caddyfile:/etc/caddy/Caddyfile
                        - ./caddy/data:/data
                        - ./caddy/config:/config
                labels:
                        - com.centurylinklabs.watchtower.enable=true

        ghost:
                image: ghost:3-alpine
                restart: always
                container_name: ghost
                ports:
                        - 2368:2368
                volumes:
                        - ./ghost/data:/var/lib/ghost/content
                environment:
                        - NODE_ENV=production
                        - url=https://yoursite.com
                labels:
                        - com.centurylinklabs.watchtower.enable=true

        watchtower:
                container_name: watchtower
                restart: always
                image: v2tec/watchtower
                volumes:
                        - /var/run/docker.sock:/var/run/docker.sock
                labels:
                        - com.centurylinklabs.watchtower.enable=true
                command: --schedule "0 0 4 * * *" --cleanup --label-enable
As you can see I also install and run Watchtower to keep the images up to date.
Now you can start them with
docker-compose run -d
Check for succesful startups in the logs
docker logs caddy
docker logs ghost
Networking
You need a static IP address, you can have 5 of them for free, so create one.
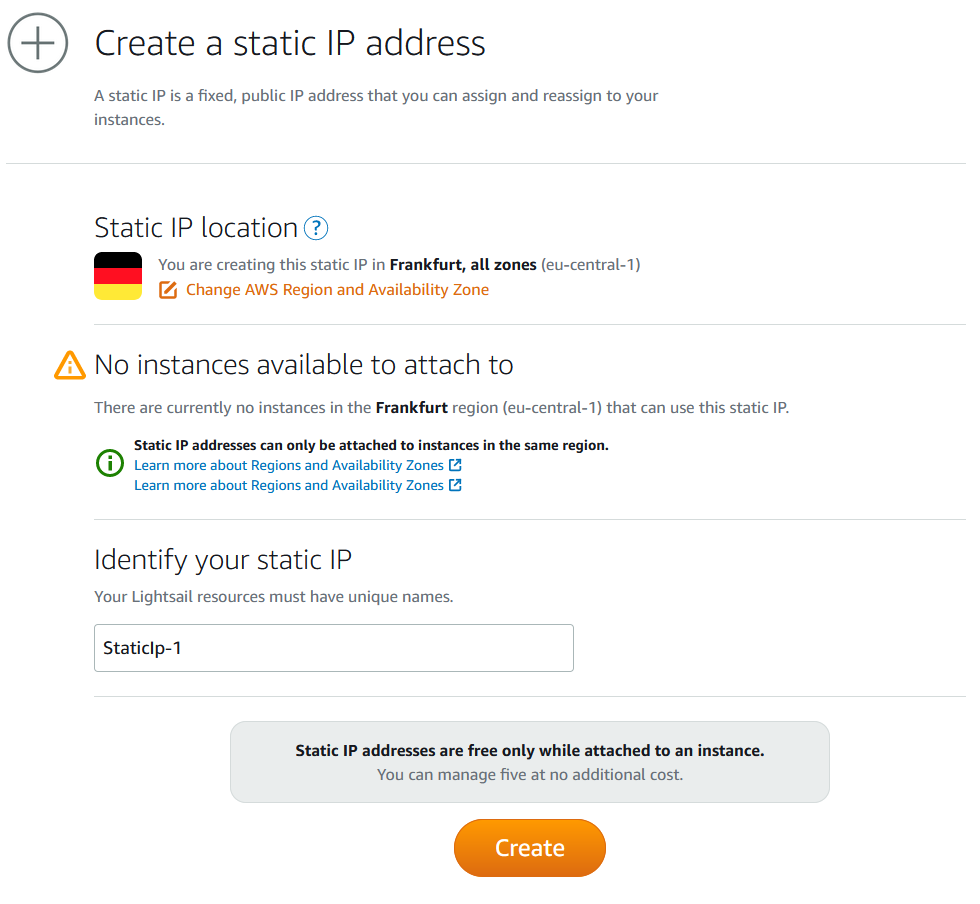
Link it to your instance, and setup the firewall, do this by clicking on the three dots on the instance and choose Manage, then Networking tab.
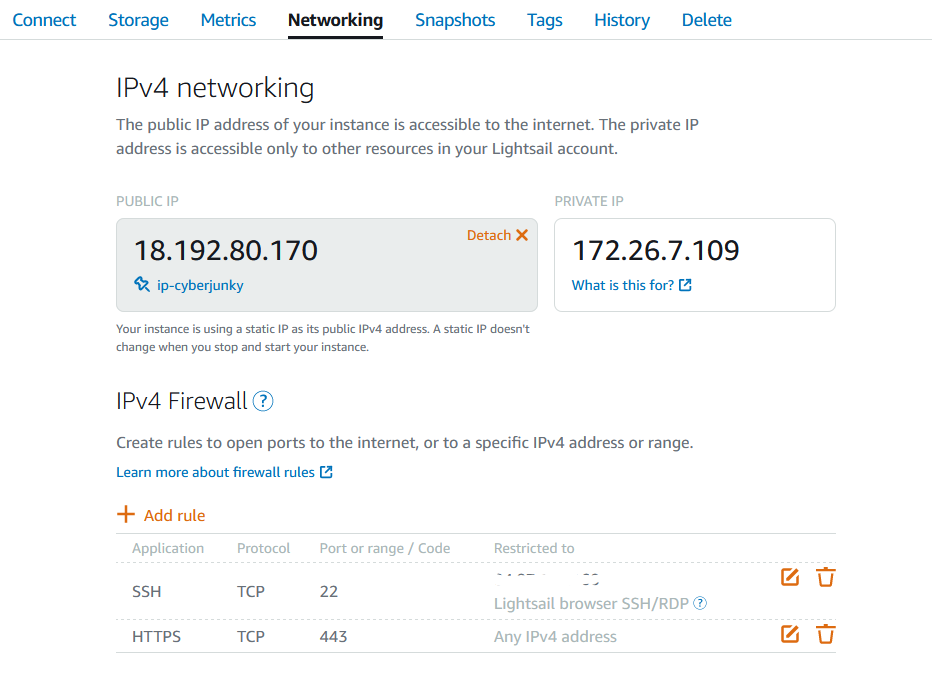
I removed port 80, I don’t need it since Route53 does proper Lets Encrypt authentication, and add your home IP address as restricted IP to SSH rule.
Setup your Domain
You need to create and set up your domain if you don’t have any. You have two options either register new domain with AWS Route 53 (not free, see below) or some third party domains such as Google Domains or GoDaddy etc.
I moved my domain from Versio to Route53, was done in an hour, then created the records needed.
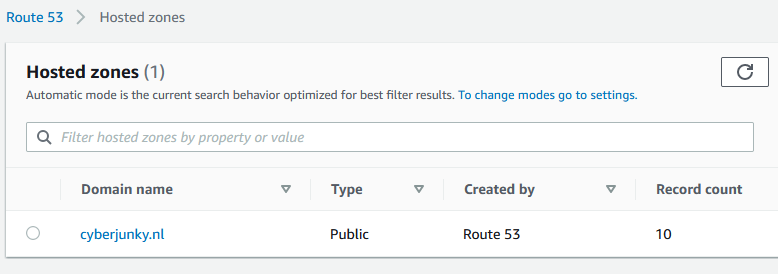
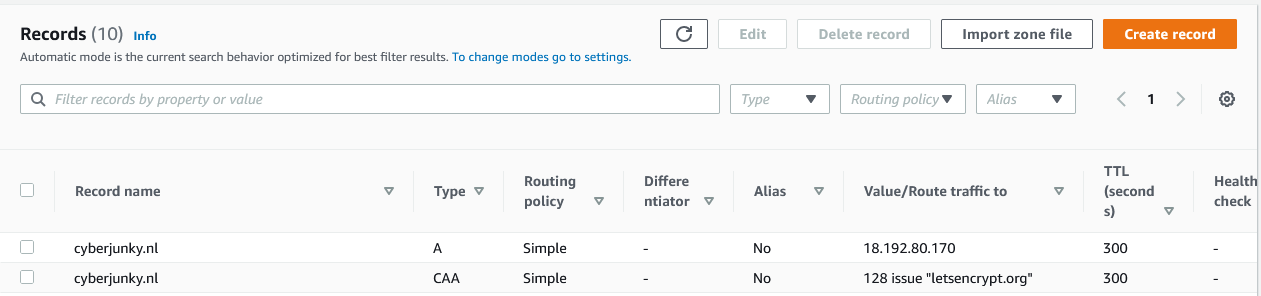
Next make sure the A-record of your domain points to this public IP address, I use Route53 as registrar and for DNS management, but this is not important.
After the record is propagated you should be able to visit your URL.
Later you can make your domain more secure, enable DNSSEC and test it, define a CAA record so you only allow Lets Encrypt to give out certs for your domain.
I also use it for e-mail, so I configured DMARC, DKIM and SPF. (out of scope)
[[https://dnssec-analyzer.verisignlabs.com/](https://dnssec-analyzer.verisignlabs.com/cyberjunky.nl)](https://dnssec-analyzer.verisignlabs.com/cyberjunky.nl)
https://www.dmarcanalyzer.com/nl/dmarc-2/dmarc-record-validatie/ https://www.dmarcanalyzer.com/nl/spf-2/checker/
Anyway you should see a virgin Ghost website now, create a admin account, and wipe the data. (Labs -> Delete all content)
If you are moving from another Ghost instance like I was, import the exported theme first, then imported the posts in JSON format, and restored the backup of my Ghost images directory.
Backups
I use AWS snapshots to create a full snapshot to keep. (not free, see below) And I have a script to make backups of my volumes and data from inside the instance.
vi ~/backup.sh

#!/bin/bash
backup_path="/home/admin/backup"
tar_opts="--exclude='/var/run/*'"
cd "${BASH_SOURCE%/*}" || exit
rm -rf $backup_path
mkdir -p $backup_path

for i in `docker inspect --format='{{.Name}}' $(docker ps -qa) | cut -f2 -d\/`
  do container_name=$i
  mkdir -p $backup_path/$container_name
  echo -n "$container_name - "
  docker run --rm \
    --volumes-from $container_name \
    -v $backup_path:/backup \
    -e TAR_OPTS="$tar_opts" \
    piscue/docker-backup \
    backup "$container_name/$container_name-volume.tar.xz"
  echo "OK"
done

tar -czvf ./backup-server.tar.gz --exclude=".[^/]*" .
rm -rf $backup_path

chmod +x ./backup.sh
It uses “piscue/docker-backup” repo to make backups of Docker containers.
https://hub.docker.com/r/piscue/docker-backup/
Costs
Now the most fussy part of this story. (same for all Cloud providers)
https://console.aws.amazon.com/billing/home?region=eu-central-1#/
Yearly:
Registrar costs for cyberjunky.nl domain $ 10.00 = € 8.23
Monthly:
Lightsail Instance = $ 3.50
Snapshot 20GB * $ 0.05 = $ 1.00
Key management (CMK for DNSSEC) = $0.52
Route53 per hosted zone (for first 25) * 1 = $0.50
Route53 for 1.000.000 queries $ 0.50 = $ 0.02
Total per Month: $ 5.54 = € 4.56